Friday, August 19, 2011

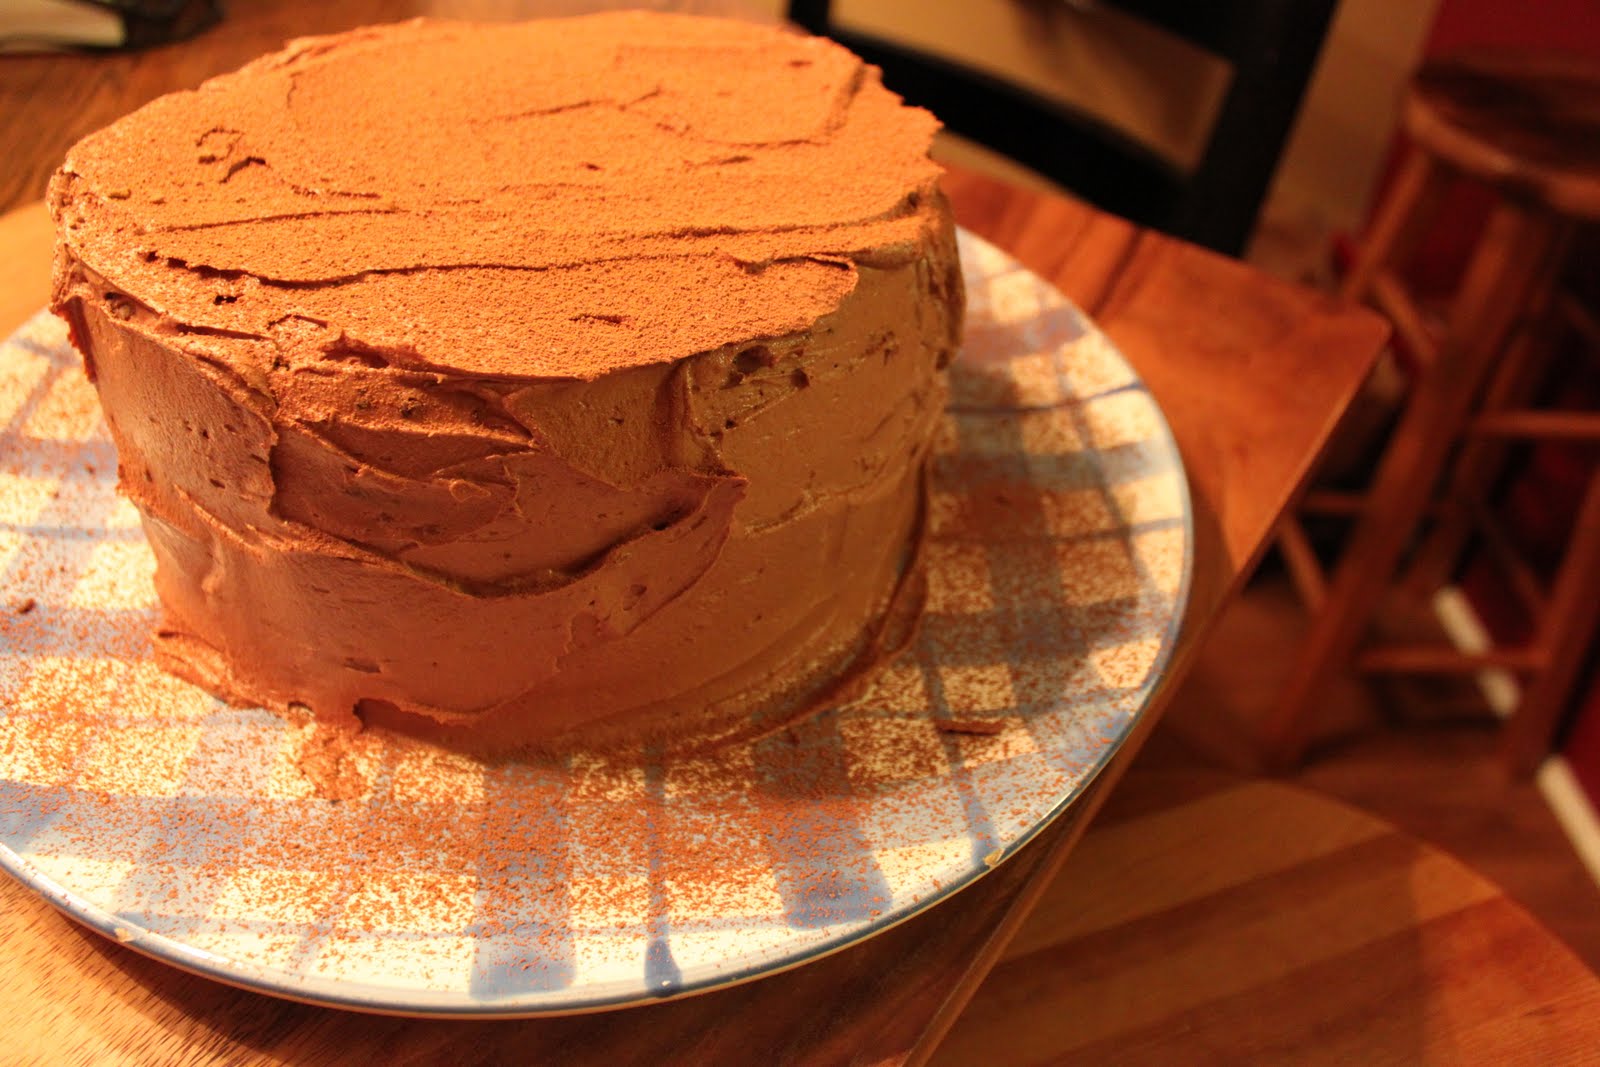
Free Recipe Friday? Meet Chocolate.

Well, it just seems perfectly fitting
that our first dessert for
Free Recipe Friday
is none other than CHOCOLATE!


But first, a few chocolate facts!  Did you know?

-- Dark chocolate stored under perfect conditions
will last for 10 years.

-- The United States produces more chocolate
than any other country.

-- The Swiss eat more chocolate
than any other country.

-- On average, the Swiss eat twenty-one pounds
of chocolate every day. (England is second.)
-- On average, every American eats
ten to twelve pounds of chocolate each year.
-- Cocoa is harvested twice a year.
-- The anti-oxidants in chocolate
lower your risk of heart disease.

-- In North America, more people crave chocolate
than any other food.

-- White chocolate contains no chocolate.
-- The very first recipe for chocolate brownies
appeared in 1896
in the Fanny Farmer cookbook.


Now you know!
 .  .  .  .  .  .  .  .  .  .  .  .  .  .  .  .  .  .  .  .  .  .  .  .  .  .  .  .  .  .  .  .

Now, from time to time,
new recipes come across your path
and you make a mental note saying
'I am going to try that sometime'
knowing full well you have no intention of doing so,
unless some freak life circumstances occur
and you have no access to recipes anymore.
This recipe was baked and eaten
by our family in a similar way...
...without the freaky life circumstances part.
(Well, actually the following story is kind of
a freaky life circumstance.)

A business owner that I highly admire,
of GiGi's Fabulous Kids,
in Rosemary Beach, Florida -
you seriously must go there!!!!!
Anyway, she happened to email me
(since I made cakes)
asking if I knew of any
eggless chocolate cake recipes. 
She and her husband had a house guest
that was highly allergic to eggs, but
had tried many egg-less recipes that ended up
going into the trash.  I pushed my sleeves up,
dug thru some recipes and sent a few of them for her to try.


Rosemary Beach truly resembles a little European town
on the most beautiful beaches ever!


Okay, back to the cake...
low and behold, I received an email
from her WITH PICS, stating this was the best
chocolate cake they ever had and would
continue to make this cake forever - if they had an
egg allergy guest or not!  So we HAD to try it.
We just HAD TO!   And so should YOU!
You will truly wonder why cakes need eggs at all
after you try this one!

INGREDIENTS
2 cups All Purpose Flour
3/4 cup Unsweetened Cocoa Powder
1 and 1/2 teaspoon Baking Soda
1 and 1/4 teaspoon Baking Powder
1/4 teaspoon Salt
3/4 cup Unsalted Butter, at room temperature
3/4 cup Granulated Sugar
3/4 cup Brown Sugar, lightly packed
1/2 cup Unsweetened Applesauce
1/2 tablespoon Apple Cider Vinegar
1 and 1/2 cups Buttermilk
1 teaspoon Vanilla Extract

INGREDIENTS for FROSTING
1 cup Unsalted Butter, at room temperature
2-4 oz. bars Bitter-Sweet Chocolate,
chopped and melted
(we used Ghirardelli-60% Cacao)
1 tablespoon Vanilla
1/4 teaspoon Salt
6 cups Powdered Sugar
1/2 cup Milk
1/4 cup water/Milk/Strong Coffee -
optional, if frosting needs to be thinned


PROCEDURE
1.  Preheat oven to 325 F. 
Spray two 8 or 9 inch round cake pans
with non stick cooking spray.

2.  Sift together the flour, cocoa powder,
baking powder, baking soda and salt
in a medium sized bowl. Stir until mixed. 
Set aside.

3.  Beat butter with both sugars in a large bowl,
using an electric mixer on medium
for about 3 minutes.

4.   Add the applesauce in two additions,
beating well -
scraping down the sides of the bowl
after each addition.
Mix in the vinegar too.
The mixture will look curdled but don’t worry.

5.  Beat in vanilla.

6.  Reduce speed and beat one third of flour mixture
into the buttery mixture,
then add half the buttermilk.

7.  Repeat additions, scraping down sides
until all is well mixed.

8.  Divide batter evenly between pans and
tap the pans lightly to remove air pockets if any.

9.  Bake on the center racks of your oven
until a tooth pick inserted
in the center of cakes comes out clean,
25 to 30 min.


10.  Remove cakes/pans from the oven
and place on a wire rack. 
***Free tip - immediately cover both cakes
with a piece of wax paper. 
This will keep all of the moisture
from evaporating out of your cakes. 
You're welcome! :) 

11.  Cool cakes in their cake pans
on a rack for 8-10 minutes.

12.  Run a knife around inside edge of each pan
and then turn cakes out onto rack.

13.  Cover the exposed, bottoms of each cake
with another piece of wax paper.

14.  Let cool completely, about 1 hour. 
I like to cool them in the fridge or freezer
right on the cooling rack
with just their wax paper covering
the tops and bottoms!
This also will help firm up the cake a bit
as it is a tad more fragile
than a cake baked with eggs. 
You can create the frosting
while the cakes are cooling!
.  .  .  .  .  .  .  .  .  .  .  .  .  .  .  .  .  .  .  .  .  .  .  .  .  .  .  .  .  .

PREPARING the ICING:
1.  Beat butter for icing in a large bowl,
using an electric mixer/hand beater
on medium, until creamy, 1 min.
2.  Add melted chocolate, vanilla,
salt and 1 cup icing sugar. Beat for 1 minute.

3.  With mixer on medium-low,
add remaining sugar in 3 parts,
alternating remaining liquids
(milk and optional coffee) and ending with sugar.

4.  Beat on medium-high,
scraping down sides of bowl as needed,
until fluffy and smooth, 1 to 2 minutes.

 .  .  .  .  .  .  .  .  .  .  .  .  .  .  .  .  .  .  .  .  .  .  .  .  .  .  .  .  .  .  .

FINISHING:
When the cakes are all nice
and ready to be frosted,
you can use a long, serrated knife
(we used a bread knife)
to slice the 2 cakes into 4. 
Don't be scared, you can do it! 
Spread each layer with the yummy frosting,
layering up as you go. 
Frosting the cake right on a serving plate.
Delicious-ness!
Now grab a plate,
put you a slice of this amazing cake on it 
and fill a big ol' glass with ice cold milk...
and you might just have to go slap somebody,
it's THAT good!


*Disclaimer: Please do not go slap anybody...
unless they try to take your cake ;)

ENJOY!!!!

Friday, August 12, 2011

It's Friday...Free Recipe Time!

An Ode to Rosemary
(and Chicken)


Rose·mar·y [rohz-mair-ee, -muh-ree] noun, plural -mar·ies.
An evergreen shrub, Rosmarinus officinalis, of the mint family,
native to the Mediterranean region, having leathery, narrow leaves
and pale-blue, bell-shaped flowers, used as a seasoning
and in perfumery and medicine: a traditional symbol of remembrance.

Ahh, doesn't that sound heavenly?
And a day of remembrance we had preparing for this!
Memory Number Uno - we have recently returned from
what our family deems, the most beautiful place in America -
the beautiful beaches along Scenic Highway 30A
in the Florida panhandle (between Destin and Panama City).
WHERE, I might add, we visited one of our favorite spots,
ROSEMARY beach!
Memory Number Dos - as we were shopping for ingredients
for this recipe, we were reminded of the fragrance
that was on our hands and that was filling our car.
We had just returned from the home of some
dear friends gathering a bucketful of said ROSEMARY!
Mmm, heavenly.
and Memory Number Tres - a rather strange memory,
our check out girl's NAME was ROSEMARY!
How freaky is that?!?

Okay, so, enough rambling and reminiscing...
we've got some cookin' to do.
Today's recipe may not even count as a 'recipe'
but more of an 'idea' - so, use it up!

I recently had the privilege of cooking this Rosemary Chicken
my amazing boss and my awesome husband
gets to be a part of!!!  What a treat!
(So do not be alarmed by the mass quantities of
chicken shown in these photos - over 200 pieces).
This is sooo easy, you could do it with your eyes closed!

THINGS YOU WILL NEED
Fresh Rosemary
Chicken Pieces - raw, thawed
Chopped/Diced Garlic
Salt/Pepper
Cooking Spray
Olive Oil/Butter
Roasting Pan/Casserole Dish
Oven  :)

First off, you must find a friend that has loads of rosemary
and wouldn't mind you snipping a handful of.

Nextly, you need chicken.  What kind of chicken?
Any kind you would like.  How's that?!
At home, for this particular recipe,
we prefer chicken thighs - skin on, bone in.
But for this particular night and group of people
we were feeding, we chose a mixture of
chicken thighs, breasts, and drumsticks.
You decide how many mouths to feed and purchase
whatever variation you need!
With me so far?


Now it's time to season the thawed, raw chicken.
First off, I understand that there are some people out there
that are on a very limited sodium diet, but if you are not,
please, please, please do not be afraid of
salt and pepper in your food!
I believe the reason some foods don't taste as good as they should
is rarely because someone is a bad cook,
but simply because it lacks enough of this simple ingredient - salt.
I'm not saying be a salt hog, but you would be surprised
how much better your food would be if you added salt
DURING the cooking process, NOT after.
There's just something about adding salt WHILE
you are cooking chili, spaghetti sauce, soups, and meats
that you just cannot reach the same level of goodness
if you add salt after cooking.  In fact, I believe
 it takes MORE salt afterwards and the flavor is still
never quite there. 

SO, spray a nice baking dish
(preferably some type of metal roasting pan -
however, glass would work as well)
with cooking spray liberally OR
if you are using chicken breasts,
drizzle your pan with olive oil and
a few tablespoons of butter.
Those boneless, skinless chicken breasts
will need a little fat in the pan!
NOW, apply salt and pepper on ALL sides of your raw chicken.
Don't be scared.
Place seasoned chicken pieces in the baking dish
Now, liberally sprinkle, dab, drop or spread
diced/chopped garlic all over the chicken.
Again, do not be afraid. 
Do you know how good garlic is for you???

NOW, your kitchen is a bout to go over the top
with some amazing smells.  As if the garlic wasn't amazing enough!
Take your gently washed/rinsed rosemary stems/branches
and either cut them into 2-3 inch pieces or hold the
rosemary over your baking dish and snip, snip, snip
the rosemary randomly all over the chicken.
If you would rather not have little flecks of rosemary
all in your chicken, I would suggest tucking
a 2-3 inch piece of cut rosemary underneath
each piece of chicken.  So far so good right?!


Now, pause for a minute and just breathe in the yumminess! Ahh!
Okay, back to reality.

Place chicken in your preheated 375 degree oven
for about 40 minutes -  if they are nicely spread apart.
We usually have to cook ours an hour or so (for our family)
because we usually cook 15-20 thighs.
You will know they are done when the skin-on chicken
is nice and golden and crispy! Mmm.
Please note that if you are baking this using chicken breasts,
you must flip them several times during the cooking process
to keep them from drying out.  It's not a bad idea
to keep an eye on the thighs as well and you may
want to flip those once or twice...
stirring the rosemary around as well so that it will not dry out.


And there you have it!
Although we were not responsible for any side dishes for our chicken,
it goes great with most any side dish
because the flavor is not at all overpowering.

Now, go ye therefore....and EAT!

Friday, August 5, 2011

Free Recipe Friday


Welcome back to FREE RECIPE FRIDAY,
where you can pop in and pick up a recipe at no charge :) 
Today's recipe is brought to you by "HeatWave 2011!" 

On this Free Friday, we are servin' up GAZPACHO.
Gazpacho with Shrimp and Corn to be exact. 
Say it with me...guh-SPAH-cho...
OR, if you're from East Texas...guz-POCH-ohhh). 
Raise your hand if you've ever tried it!? 
Raise your hand if you've never heard of it!? 
Okay, so, quick foodie lesson. 
Gazpacho is a cold, tomato-based raw vegetable soup,
mostly consumed in the summer months
due to it's cold temperature and acidic bite.
There are many versions and variations,
but generally they all keep with a tomato base,
along with cucumbers, red onions, garlic, olive oil
and some type of vinegar or lemon juice....and most often
accompanied by some crusty bread or croutons. 
Lesson is over.

Let me first start off by saying that I have never actually had any desire
to eat COLD SOUP.  I can handle most all foods
at room temperature, even coffee...
but COLD SOUP?  Not so much.
But when I came across a blog with a recipe for Gazpacho on it,
the pictures made me want to try it instantly. 
And in case you didn't know,
the temperatures outside are definitely screaming 'summer months!'
So it was time to venture out and give it a try...and WOW!
This is also a great, simple, 'do ahead' meal -
and looks and sounds so fancy and bistro-ish! 

Gazpacho is also deceivingly filling,
especially with a few shrimp in your bowl!
It is SO yummy and fresh tasting,
I believe I will go eat some leftovers now!

Follow along and you too can learn how to create this very easy,
make ahead 'liquid salad.'

Gazpacho with Grilled Shrimp and Corn

4 med. ripe tomatoes | diced (we used grape tomatoes)
2 med. red bell peppers | seeded, deribbed and finely chopped
(we used one large orange one)
2 med. cucumbers | peeled, seeded and coarsely chopped
1 med. red onion | coursely chopped
2 cloves garlic | minced
2 cups chicken broth
Side Note:
(we used 'Better Than Boullion' paste for ours - a very good product 
and is also available in beef, ham and tomato!  
If you are not using homemade broth,
please look for products that do not list salt as the first ingredient -
did you know that the ingredients
on products are listed in order of quantity in the product?)
1/3 cup red wine vinegar
dash of Tabasco
pinch of cayenne pepper
2 Tablespoons capers, drained
salt and pepper to taste
- - - - -
1/2 lb. (about 18 large shrimp) | peeled and deveined
2 ears fresh corn | peeled
olive oil for brushing corn
1/4 chopped fresh cilantro for garnish

Place the first 11 ingredients in a large bowl and stir to mix well.


Transfer half of the mixture to a blender or food processor and process until smooth.
Return mixture to the bowl and mix well.
Taste for seasonings and adjust if necessary. 
Cover and refrigerate for at least 4 hours or overnight
(Great to make ahead!).


For cooking the shrimp and corn, you can grill them both or saute in a very hot pan as we did. 
We even used CANNED CORN!  We drained it, and sauted it in a very hot skillet with a little butter and salt and pepper until some of the corn started turning golden brown. Add to the gazpacho.
If you grill the corn, brush with butter or olive oil while you turn the corn.  When the corn is cool enough to handle, scrape the corn from the cob and add to the gazpacho.

The same goes for the peeled, deveined shrimp.  You can grill it or saute in a hot skillet.
After we removed the corn from our hot skillet, we added the shrimp with a little olive oil and salt and pepper.  Either way is fine.


NOW, to serve, ladle the gazpacho soup into shallow bowls,
top with some shrimp (grilled or sauteed)
and sprinkle with some cilantro. 
Serve with some warm crusty bread such as ciabatta.


Enjoy this Free Recipe Friday!

Friday, July 29, 2011

Free Recipe Friday

  Welcome, welcome, welcome...to the new weekly series we are calling Free Recipe Friday, where we share free recipes with you!  Some new, some old, some tried and true.  We will give you, hopefully, easy to follow instructions with some enticing pics taken by
Shelby Taylor Photography! 
(On a side note, food styling/photography
is way harder than it looks!!!!)
 
  The first recipe out of the bag is one I had to re-create because I was craving it.  Before you boo and hiss because it's 'just a salad' - please remember it is 893 degrees outside, we haven't had substantial rain here since, well, I can't remember - springtime???
So, recipes that require turning the oven on
have kind of been on the back burner (no pun intended, ha). 

  On our recent vacation to the amazing Florida panhandle, we had dinner with some friends at Wild Olives, a little bistro/market in the Seacrest/Rosemary Beach area.  They had some really neat things on their menu and I ordered the Mediterranean Salad.  Probably not a new creation by any means, but to this East Texas gal it was!  The entire time I am eating the salad I am dissecting it and thinking,
'I am making this when we get home'...so...VOILA! Enjoy! 


DISCLAIMER: I would like to remind you that I am not much of a 'measurer' when it comes to cooking - some of you know this...and I'm sorry if it drives you insane. 
When I was watching an old cooking show on PBS recently
(an authentic italian cooking show with Lidia Bastianich)
her quote really struck a chord with me. 
I thought, 'ahhh, YES, that's IT...that's ME!' - so here it is...
to encourage YOU to get comfortable in the kitchen...
and 'let go' sometimes!

"Cooking is...yes, about following a recipe...but at some point, you gotta let go of the recipe
...you got to be in control"
- Lidia Bastianich (in her thick italian accent!)

So, henceforth, please be understanding in my recipe 'guestimates'
it'll be okay, really...I promise...be brave!


WHAT YOU WILL NEED:
Mixed Greens - WHATEVER YOU LIKE (we used the Spring Mix, sold in a plastic container)
Grape Tomatoes - halved - we would have preferred homegrown, but the next best store bought thing with flavor is either Grape or Roma Tomatoes
Kalamata Olives - pitted, sold in a jar
Feta Cheese - crumbled
Diced Red Onion - (sadly we had to omit, because we didn't have any)
Diced Cucumber - cut in half lengthwise and seeds scraped out (this keeps your salad crispier)
Shrimp - about 1 lb. - (peeled) grilled, sauteed, steamed, baked, however you'd like them quite frankly!

Dressing ingredients:  The icing on the cake for this salad!
     (Believe it or not, I DID measure these ingredients)
    Whisk the following ingredients together in a medium size bowl -
     this made PLENTY for 6 adults with a cup or more leftover.

1 1/2 cups good olive oil
1/2 cup red wine vinegar, plus
2 tablespoons red wine vinegar
1 teaspoon sugar
1 1/2 tablespoons oregano
        (I used way less, only because I do not care much for oregano - remember, make it your own!)
1 1/2 tablespoons basil
2 teaspoons salt
1 tablespoon onion powder
1 tablespoon fresh minced garlic clove (or to taste)
1 1/2 tablespoons Dijon mustard
1/3 cup parmesan cheese
1/2-1 teaspoon fresh ground black pepper (or to taste)

Taste for saltiness and pour into a bottle or container.


For our salads, we kept the different ingredients in small bowls
and then placed a handful of greens on our plate 
and topped each individual salad with our fav ingredients,
swirled the yummy dressing on it
and ate it up along with some crunchy garlic bread.
YUM!


Now, see?  That wasn't so hard was it?! 
Try it, your taste buds will thank you!
Mmm, delicious! 
See ya next week!

Monday, March 21, 2011

meatloaf monday


I know to some of you, the word 'meatloaf' kind of makes you say blek - as it did for me growing up - even now, it's not my most favorite 'meal' out there...yet, it is such a comfort food - and once it's on the table, I DO enjoy it...and my husband really LOVES it, so there!

On this sort of Mundane Monday, and the first full day of spring, the first back to reality day after a glorious spring break week...well, this day just cried out 'easy meal night'!  A simple meal maybe, but flavor-less, no way.  There's just something about spreading that traditional catsup on top of that meatloaf, cracking fresh black pepper on top and then covering with fresh slices of bell peppers...as I put it into the oven, my mind says, 'aww that's just like mom used to make it' - maybe THAT'S the comfort part.  Then there's the what goes INTO meatloaf...THAT is the REAL mystery...sort of like tuna salad! Some things I just can't trust unless I have personally made them...please tell me I am not the only one that does this?!?!!
In our family, meatloaf has traditionally never had the exact same ingredients each time, but they've all come from a master list of ingredients that always stayed the same.  What is chosen from that master list just depends on what is in the pantry at any given time. 


Our master list always consisted of:
eggs (sometimes one, sometimes two)
diced onions
garlic (chopped and powder)
raw oatmeal
crackers (saltines or ritz)
rice
breadcrumbs
milk
dry onion soup mix
catsup
salt/pepper
sliced bell peppers
Then, on any given evening that meatloaf is to be made - we choose any variety of these ingredients to add to a pound or so of ground beef...but we always, I mean always, spread catsup on top...even if we don't lay cute little bell pepper slices on top...the catsup is a must!
How do you like YOUR meatloaf???


Followers