Friday, September 23, 2011

Free Recipe Friday. . .you GOTTA try these!

Homemade Peppermint Patties!

It sounds impossible, I know...
but these are even better
than those preservative filled 'York' ones!
You can easily go from eating 1 to 12 in just one sitting!
Kidding, just kidding....or am I?!?
The ingredients are amazingly simple
and the process is eeeasyy peazy.

This recipe is not only to die for, but it will give you a reason,
an excuse if you will (if you needed one)
to go to Hobby Lobby or Michael's. 
And you're welcome!
There's one ingredient you may need to pick up there...
it's the Creme de Menthe extract,
or Peppermint extracts/flavoring, whichever you would prefer.
(You can also order from HERE for much cheaper)
Everything else you probably have in your pantry right now!!! 
So go grab you an assortment of those extracts if you'd like...
(you never know when they will come in handy)
and let's get to cooking! 


INGREDIENTS

1 can sweetened condensed milk

5 1/2 cups powdered sugar, sifted

1 tablespoon peppermint extract
(we used TWO little bottles of creme de menthe
and it wasn't even quite 1 tablespoon and flavored it perfectly) 

3 cups semisweet chocolate chips
(we used semisweet baking squares for half 
and bittersweet baking squares for the other half!) 

3 tablespoons shortening

- - - - - - - - - - - - - - - - - - - - - - - - - - - - - - - - - - - - -

INSTRUCTIONS

Add condensed milk, 2 cups of powdered sugar,
and peppermint/creme de menthe extract to a large mixing bowl.
Mix everything on medium speed using the paddle attachment
until all the ingredients are well incorporated.
Add more powdered sugar, 1/2 cup at a time,
until the dough is stiff but still pliable.


But be careful...sometimes THIS can happen!


Roll 3/4″ balls of dough between the palms of the hands.


Press each ball down slowly
and set the flattened disk on a flat cutting board or plate.
Transfer peppermint disks to the freezer for no longer than 30 minutes.
While the dough is chilling, temper the chocolate coating.

Place chocolate chips (or squares) in a microwavable bowl.
Melt the chocolate in 30 second increments,
making sure to stir after each time until chocolate is smooth.
Stir in shortening to thin the chocolate.
Remove patties from the freezer.

Place a patty on the tines of the fork
and dip in the chocolate until completely covered.
Allow excess chocolate to drip off the patty
before setting each one on top of wax or parchment paper.


Allow the chocolate coated peppermint patties to completely set up.
This can be done quicker by placing the patties in the refrigerator.
The peppermint patties are ready when they are dry to the touch.

Enjoy!


Friday, September 16, 2011

Free Recipe Friday...Spinach Anyone???

There's sooo much more to this recipe than just saying it's all about spinach.
It's Spinach Manicotti and it's pure delicious-ness! 

Greens of any kind have never been my first choice,
for any meal or side dish... 
so for me, the spinach in this recipe is a big deal! 
What I have had to do over the years is find ways
to make those vitamin rich greens into something I will eat...
and this one stands quite tall! 
My family on the other hand, really has no problem with greens whatsoever. 
Our youngest daughter has surprised me the most. 
She is a whopping 12 1/2 years old and loves all kinds of 'weird' things.  
The night I made this dish,
she actually requested a separate serving of plain spinach on the side! 
(She LOVES it, along with sardines, brussel sprouts, okra and broccoli!) 
This recipe came from our handy, dandy, treasured church cookbook. 
Aren't those the best!?
The official name for this deliciousness is
'Make-Ahead Spinach Manicotti'
(page 86, thank you Cindy Chessman!!!)
I remember wayyy back in the day
when we all were told we had to boil noodles
for such dishes as manicotti, lasagna, etc.,
before assembling...it just made me dread making them.
Then I stumbled upon this jewel of a recipe.
You can make it ahead! You don't have to boil the noodles!  Yay!
This recipe opened up a whole new realm for me.
I realized that if I could make this recipe ahead,
I could make lasagna ahead as well - without boiling the noodles!
No more buying the 'no boil' noodles...what a waste!
(Just make sure it's a bit more 'liquidy'
as the noodles will absorb a bit of liquid.)
So, let's get started......so you too, can enjoy this
ooey, gooey-ness, filled with yummy spinach...there, I said it!

MAKE-AHEAD SPINACH MANICOTTI

THE INGREDIENTS
1 - 15 oz. carton ricotta cheese
1 - 10 oz. pkg. frozen, chopped spinach
thawed and squeezed dry
1 1/2 cup shredded mozzarella (we double this)
3/4 cup parmesan
1 egg
*seasoning have been adjusted to our tastes*
2 teaspoons dried parsley
1 teaspoon black pepper
1 1/2 teaspoons salt
2 teaspoons garlic powder
 2 cans (or jars) of your favorite spaghetti sauce
1 - 8 oz. pkg manicotti shells


WHAT TO DO
Spray a 9x13 casserole dish with vegetable spray
and pour a bit of spaghetti sauce to cover the bottom.
Set aside.  In a large bowl combine ricotta, spinach,
half of the mozzarella and parmesan,
the egg and the spices.  Mix well. 
Here's the fun part. 
If you can incooperate your family somehow in this process,
it would be great.  It can get a bit messy!
Fill, smoosh or stuff the uncooked manicotti shells
with your ricotta mixture.  I just use my hands.
You could put the mixture in a gallon freezer bag,
cut off a corner and squeeze it in the shells...
or use a pastry bag...but sometimes I'm just too cheap and so
I've just found it to be quicker and 'less mess'
to just grab a handful of the mixture
and push it in each end of the manicotti shell. 
Next, place each filled shell on top of the layer of sauce in your 9x13 pan.
Fill remaining shells and place into you casserole pan.
Pour remaining spaghetti/marinara sauce onto shells in pan.
Top with remaining mozzarella and parmesan cheeses.
You can either cover and refrigerate overnight at this point,
as the cookbook recipe states
or go ahead and bake...which is what we usually do.
Just remember if you refrigerate it overnight
you will need to let it come to room temp a bit
before placing it into the oven.


Bake at 350 for appx 45 minutes.
Let it rest and cool down from it's lava hotness a bit.
Serve with a great salad and some crunchy bread! Yum!


Saturday, September 10, 2011

Free Recipe Friday.....On Saturday???

So sorry for the delay everyone....all twelve of you that read this blog.
I had started off with it just being an apology
for not having a FRF...on Friday....but as my words grew,
I realized, I might as well make it into the full deal - just released a day later :/

We did actually make French Onion Soup last night...
at the end of an emotional, roller coaster week... 
just not enough free time to upload pics and write.
If you have only even seen one newscast this week
you will know of the craziness of which I speak.
We've almost had too many wildfires to count or keep track of. 
Wondering if wildfires can really spread that fast,
realizing they can AND do.
Wondering if our neighborhood will be the next to be evacuated
as you watch those around you that have been.
Wondering what we would grab if we were given one hour to leave
and realizing out of everything we have,
all we really care about could fit in the trunk of our car!
We've been totally blown away by the many firemen, volunteers
and everyday citizens, who have risked and are STILL
risking their lives for so many...and wondering when it will rain...
as we rest in Psalm 91...
...He is my refuge and my fortress; My God, in Him I will trust...
He shall cover you with His feathers, and under His wings
you shall take refuge... 

NOW, THE SOUP


"I’m firmly of the belief that no matter what ails you
in the realm of the kitchen, onion soup can cure it.
Never cooked before?
Don’t think you’ll be able to pull off the kind of cooking you believe you need
to go to a restaurant to experience? Start with onion soup.
Have only $5 to spend on dinner?
Refrigerator is almost bare? Onion soup is your friend.
Want your home to have a transcendent aroma bouncing off every wall,
the kind that’s so distracting that you don’t even know or care
what’s on the stove, only that you must have it now?
Onion soup is waiting for you."
- taken from The Smitten Kitchen

What a perfect way to describe French Onion Soup
and the ease of cooking it. 
SUCH a cheap meal as well, yet so so elegant. 
I beg you not to skimp on the very long caramelization process that is KEY -
and it's the hardest part of the whole deal....
just waiting and not rushing the onions.

There are many recipes out there and all are quite similar...please try one!
All you need are onions, garlic, and some beef stock.
Some call for a little white wine or lemon juice to finish it off,
salt and pepper, and maybe some thyme and/or bay leaf...
then top it off with some crusty croutons
or crunchy bread smothered in cheese. 
I have had this particular recipe since the late 80's...
and children, that would be the 1980's! 
Although our kids never really cared for the onions in this soup
when they were younger,
they knew they had to eat what was on the table or go to bed hungry...
so they would usually slurp up the beef broth
and then fill up on the cheesy, crusty bread! 
Now that we are mostly all grown-ups around here, 
everyone gobbles the soup, onions and all. 


ONION SOUP WITH CHEESE CROUTONS

THE RECIPE
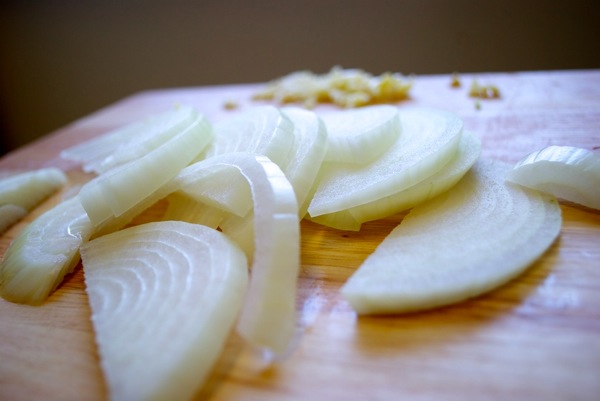
3 onions - peeled, halved and thinly sliced
2-3 Tablespoons oil
(vegetable oil or olive oil)
2-3 Tablespoons butter
2 cloves garlic, finely chopped
3 Tablespoons all-purpose flour
beef stock - appx. 6 cups or more
(homemade, canned (low sodium) or paste in a jar,
but please, no boullion cubes!)
2 bay leaves
1/2 teaspoon fresh thyme or 1/4 teaspoon dried
appx. 3 teaspoons salt (will depend on your broth)
ground black pepper to taste
2-3 teaspoons lemon juice


THE HOW TO
Heat together oil and butter in a large,
heavy-bottomed dutch oven or stockpot.
Add onions; stir to coat well.
Reduce heat to medium-low. 
Cover and cook, stirring occasionally,
until onions are very limp and just beginning to color
(about 20 minutes).  Do not rush this.
Stir in chopped garlic. 
Increase heat to medium.
Cook, uncovered, stirring frequently
until onions are amber or caramel colored.
About 30 minutes.
Stir more frequently toward end of cooking time
to prevent sticking. 
Sprinkle onions with the flour.
Stir to thoroughly combine flour with onions.
Cook over medium heat for 2-3 minutes,
stirring mixture frequently.
Stir in 1 cup of the broth, scraping up browned bits
from the bottom.  Bring to gentle boil;
Cook 1 minute.  Stir in bay leaves, thyme,
remaining broth and salt, if using.
Simmer partially covered, 20-30 minutes.
Before serving, remove bay leaves and add lemon juice.


In the meantime...HOW TO MAKE THE CROUTONS
1 loaf french bread - sliced diagonally, 3/4 inch thick
chopped garlic
enough cheese to cover your slices of bread
(this recipe calls for Gruyere cheese - we used Mozzarella)
Parmesan cheese

Place bread slices on a cookie sheet.
(Trim if needed, so slices will fit into soup bowls.)
Place in 350 degree oven until golden brown and crispy
(about 15 minutes).  The bread needs a good crunch
to it so it won't get soggy in your soup bowl.
Remove from oven and increase oven temp to 375.
Dab each of the croutons (bread slices) with crushed garlic.
Place cheese on each slice to cover and sprinkle each
with about 1 teaspoon Parmesan cheese.
Return to 375 oven and bake until
cheese is melted and golden brown. 


TO SERVE
Ladle the soup into soup crocks or bowls.
With a spatula, transfer one 'crouton' to each bowl of onion soup.
Serve immediately! Mmm.


Friday, September 2, 2011

Free Recipe Friday. . .Uhhh

Hello Friday...it's time for another installment of Free Recipe Friday. 
What on earth will be revealed this week??? 
Oh let's see....ummm, Eggs Benedict anyone??? (with a twist, of course!)
Don't worry about the old fashioned, fancy name....
there's a reason this recipe has never been forgotten!


This Free Recipe Friday installment will consist of
not only one, but two, yes two free recipes....
first, we will learn how to make hollandaise sauce and
THEN how to poach an egg (without any fancy pans)!

I will start off by saying I have never EVER made hollandaise sauce before
nor have I poached an egg in this fashion...SO, no excuses people!!!
Secondly, I will state for the record that after this meal,
I can STILL say that I have never made hollandaise sauce
or poached an egg in this fashion.
How can she do this you say???
Well, you see, we happen to have a resident Sous Chef around here.
And she cooked this whole meal!  Kids are great aren't they?!???
If you ever get flustered because all your kids want to watch on tv
is the Food Network, DON'T!!!! It will pay off! ;)
Thank you Shelby!
What an amazing treat!!!  Especially because life here is so crazy.
But your life doesn't have to be crazy
just to enjoy this recipe!
It makes a great breakfast, lunch, dinner or meal on the fly!


THE HOLLANDAISE SAUCE
*This recipe is from none other than Tyler Florence*
(a Food Network 'founding father').
This is the yummiest sauce EVER.
For a family of four, we doubled the recipe below. 
We prefer more than a spoonful of sauce,
so by doubling the recipe, it was just barely enough
for the quantity that we prefer....
so adjust according to your needs!


4 egg yolks

1 tablespoon freshly squeezed lemon juice

1/2 cup unsalted butter, melted (1 stick)

Pinch cayenne

Pinch salt

WHAT TO DO...
Vigorously whisk the egg yolks and lemon juice together
in a stainless steel bowl until the mixture is thickened and doubled in volume.
Place the bowl over a large saucepan (or stockpot, as we did here)
containing barely simmering water (or use a double boiler)
the water should not touch the bottom of the bowl.
Continue to whisk rapidly and continuously! 
Be careful not to let the eggs get too hot or they will scramble.
Slowly drizzle in the melted butter and continue to whisk
until the sauce is thickened and doubled in volume.
Remove from heat, whisk in cayenne and salt.
Cover and place in a warm spot until ready to use for the eggs benedict.
If the sauce gets too thick, whisk in a few drops of warm water before serving.


POACHED EGGS

The Poaching Water:

2 Tbsp vinegar in about 10-12 cups of simmering water.

Bring to a boil

Add salt to taste (about 3 tsp or more)

Bring back down to gentle simmer
(*salt and water ratios are just as you would do for boiling pasta)


The Poaching Process:

Crack egg into a small bowl, then pour into a ladle

Gently plop (technical term) egg into the water.

Poach for approx 5 mins each


PUTTING IT ALL TOGETHER

Eggs Benedict, traditionally call for a poached egg,
 a slice of ham/canadian bacon and a toasted split english muffin...
with a spoonful of hollandaise sauce on top.


Our Eggs Benedict meal was done with a twist...because
WE just so happened to have some left over chicken AND bagels.
No english muffins or ham at all, but, we had SMOKED chicken!
A rottisserie chicken would be SO easy and perfect for this
if you wanted chicken.  We used chicken because we
do not usually have canadian bacon on hand...do you?!?
This is one of those recipes that is perfect for using up those
leftover meats from Sunday lunch as we did....
just as the variations listed below show...the sky is the limit!


So, toast your bagel, english muffin or whatever you decide to use.
Place toasted bread on a serving plate and layer your ham
or whatever meat you choose to use, top with your
poached egg, then top with some hollandaise sauce...voila!
ENJOY!


Variations of Eggs Benedict you might like to try...

---Eggs Florentine - replace the ham or bacon with spinach.

---Eggs Maryland - remove the ham and serve poached eggs
    drizzled with Hollandaise sauce on top of crab cakes.

---Waldorf Style Eggs - replace the English muffin with toast
     and serve with poached eggs, sautéed mushrooms and mushroom sauce.

---Norwegian Eggs - replace the ham or bacon with thin slices of smoked salmon.

---Artichoke Eggs - replace the English muffin with cooked artichoke hearts.

---Eggs Blackstone - use streaky bacon (regular bacon)
     instead of back bacon (canadian bacon) and add a slice of tomato.

---Asparagus Eggs - substitute the ham with asparagus spears.

---Country Eggs Benedict - Replace the bacon or ham with sausage slices
     and cover with sausage gravy instead of Hollandaise sauce.


Friday, August 26, 2011

Free Friday Recipe.....Pulled Pork


It's Friday...school is back in session
and that means football is kicking off
in many East Texas towns.  
 And if you have kids, that means your schedules
are getting crazy ridiculous again as well.
Crazy schedules call for easy meals...
and there's nothing more relaxing
than coming home to dinner that is already cooked.
So go drag out that crock pot,
sit down and print out this recipe!    
You can get it started in the a.m.
before you head out or on your lunch break - 
and while you are back at work,
going to a pep rally or running errands all day,
this little piggy is simmering away for your evening pleasure!

Now first things first...you need some pork for this recipe. 
You can seriously use many different pork cuts for this. 
In our household, we have used pork roasts,
blade roasts/steaks or
boston butt roasts and picnic roasts.
Find what is convenient, on sale and/or cheap.
 
Remember, cooking shouldn't stress you
by making you feel as if
you need to follow instructions down to the grain of salt. 
This is where owning the recipe comes in -  and YOU,
at some point, need to make it your own!
It's totally okay to experiment with different cuts of meat,
omit an ingredient, change up a spice, etc.
to fit your likes/dislikes.
Sometimes I hear people say, 'ooh, it has onions in it -
I could never make that for my family' - - - HELLO,
guess what??? You can OMIT the ONIONS!  Genius!
(*Baking on the other hand, requires much more precision!)


There are several little parts to this meal,
but if you take them one step at a time,
they can easily be done well in advance.

Getting started - first, I had to dust off my crock pot
and gave the inside of it a quick spray
with non-stick cooking spray. 
If you are preparing this before
you head out of the house in the morning,
turn your crockpot on low. 
If you are not starting this until lunchtime,
I would turn my crockpot on med/high to high.

FIRST THINGS YOU WILL NEED:
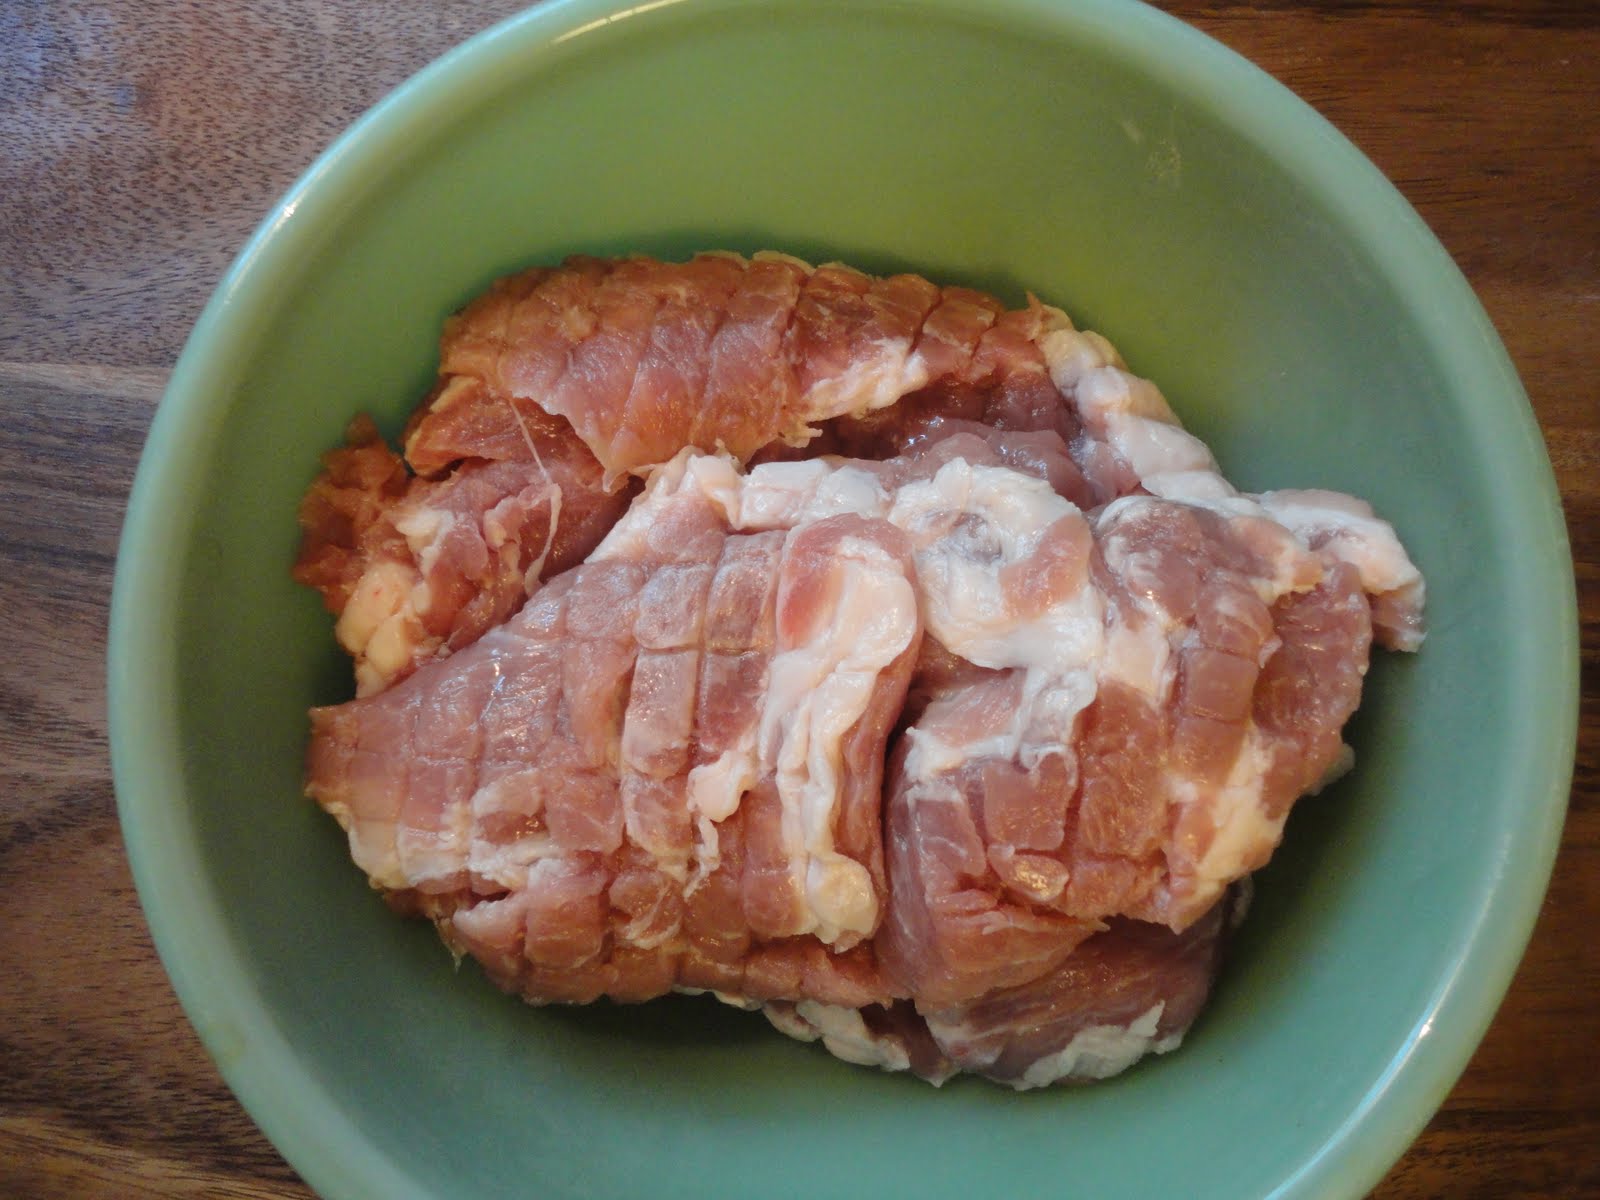
appx. 4 lbs. untrimmed pork roast (or other pork)
2 Tbsp. paprika (or smoked paprika)
1 Tbsp. mustard powder
1/4 c. packed brown sugar
1 tsp. salt
1 tsp. pepper


WHAT TO DO:
Now it's time to make the dry rub for the pork.
Combine paprika, mustard powder,
1/4 cup of the brown sugar
and salt and pepper and make into a paste or rub.


Notice I did not have dry mustard for this recipe, so I
improvised.  (Which happens often around our household.)
I used regular French's mustard - in a squirt bottle...a perfectly fine substitute.
It just means the 'dry rub' is no longer dry...and that's okay...
no one will ever know.
Mix your dry rub ingredients together and rub/smear it
all over the pork then place in the crockpot.


LIQUID YOU NEED FOR CROCKPOT AND COLESLAW:

1 Tbsp. packed brown sugar
1 tsp. salt

1 tsp. pepper
1 c. cider vinegar
1/2 c. catsup
2 tsp. crushed red pepper flakes (we only use 1 tsp.)
WHAT TO DO:
Mix this well and remove 1/3 cup
and set aside (to keep for the coleslaw)
Add 1 cup water to the remaining mixture
and pour around roast in the crockpot.

Now put the lid on your crock pot and let it do it's thing.


This next step can be done immediately
or done later on while your pork roast is cooling
and waiting to be chopped!

COLESLAW INGREDIENTS:

1/3 cup remaining mixture
(that was set aside)

1 cup mayonnaise
3-4 cups finely shredded cabbage
(or 2 - 14 oz. bags/coleslaw mix)

8 or more hamburger buns - toasted

WHAT TO DO:
Combine the reserved 1/3 cup of liquid you set aside earlier
and add in 1 c. mayo - whisk well.
Toss with your shredded cabbage.


Cover and refrigerate your coleslaw
until you are ready to assemble
your pulled pork sandwiches.

After your sweet little pork has been cooking all day,
 it should be fork-tender, and most likely falling apart...
gently transfer it to a large bowl;
remove fat and skin and discard. 

Using two forks, shred meat or chop meat with a good knife.


Carefully pour some of the sauce from your
crock pot onto the meat. That is a must.


Now it is time to assemble!!!
Toast you some buns and add a layer of coleslaw
and then some shredded pork - umm delicious!


Enjoy this after a long day at work or on a lazy Saturday.
The pork really doesn't care what day it is.

And while we are 'recipe-ing' here,
I see you eyeing those yummy potatoes
sitting beside that yummy pulled pork sandwich...
so out of the kindness of my heart,
I will toss you the recipe for those too!
After all, it's Free Recipe Friday AND
the beginning of football season as well. Geez.

Grab a bag of red potatoes and give them a good scrubbing.
Do you need the whole bag?
Most likely not, so just figure a couple of small-medium
potatoes per person.
Slice potatoes into wedges, cubes or slices.
Lay them in a single layer on a good heavy baking pan.
(I prefer a metal one - although you can easily
cook them on the stovetop in a heavy skillet.)
Drizzle (heavy handedly) with olive oil, salt, pepper and chopped garlic.
If you are really feeling zippy, toss some dry Ranch Dressing powder
all over these puppies and/or add some sliced onions.
Bake at 375 for about 45 minutes...tossing a few times
to 'unstick' any 'stuck' potatoes and to distribute the oil.
ENjoy! 


Now go relax and have fun cheering on your favorite team!

ENJOY!


Followers