Friday, March 30, 2012

Free Recipe Friday...Back to the Basics!


This week's Free Recipe Friday
may seem like the most random 'recipes' of all.
Making your own spaghetti/red sauce.
It's not just about being frugal,
it's about controlling what goes into your food as well
and creating something for yourself.

Secondly, having some things on hand
that keep well in a pantry is very important too.
It is always so nice to be able to
'throw something together' at the last minute.
Some pasta and a can or two of tomato paste are perfect things
because these keep in your pantry forever!

I began making my own sauce wayyyyy
back in the early days of 'newly-wedded-ness.'
It began originally as a way to save money
not to be all fancy - believe me!
 Then it grew into a taste thing.  
I wouldn't mind spending $4 on a jar of sauce -
(which actually would mean $8 because we had 5 mouths to feed).
But the fact that the TASTE didn't match up to the cost
and the fact that most red sauces have spices in them
that I just didn't and still don't like. 
Don't get me wrong, I love Italian food,
but too much oregano and I'm out!

Making your own basic red sauce can be custom made
to you and your family's liking.
You like tons of garlic??? Yes please!
You want zero garlic? Don't add it!
You want onions and basil? Indeed.
You want to sneak in some finely grated carrots
or bell peppers to get some vitamins into your kids?
YOU CAN DO IT! 
(and you can, you really can - they'll never know!)

Tomato paste is the bomb!
It is concentrated yumminess and if you are feeding 2 -3
one can is PLENTY!

*Side note - if you REALLY want to be frugal,
go buy a can of tomato paste
open it with a can opener on both ends
push it out keeping it in a tube shape
slice in discs, place the discs on a waxed paper
lined cookie sheet - freeze the discs, after frozen,
place discs in a freezer baggie and use the discs
from time to time to add some zing to soups and sauces. VOILA!  


Now, back to business - 
My hero, Jeff Smith, The Frugal Gourmet (below)
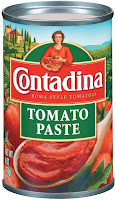
 said years and years ago that Contadina tomato paste was the best brand.


I have faithfully used that brand but it is now getting 
harder for me to find.  I WILL say, that
PLEASE, PLEASE, PLEASE,
do not buy the 'pre-flavored' paste if you can help it.
You can flavor them with basil or garlic all by yourself!
Don't fall for it!

TO START:
(this will easily feed a family of 5 with a few leftover servings)

2 cans tomato paste
water 
1/2 of a small onion, diced fine
appx. 1 tablespoon minced garlic
appx. 2 teaspoons salt
appx. 1 teaspoon ground black pepper
appx. 1 teaspoon garlic powder
a bit of olive oil
- - - - - - -
- Extras -
ground beef - browned/drained - appx. 1 pound 

parmesan cheese - 'real' or the fake powdery stuff - appx. 1/4 cup
*basil - fresh is best (5-6 leaves, chopped) but dried will do (appx. 1 teaspoon)
sundried tomatoes, fresh tomatoes, olives - you name it

*What I have started to do is....
buy a small jar of pesto and keep in the fridge - 
I add a few teaspoons of this to my sauce
(which takes care of the basil need)
and it is also great to toss plain pasta with on the fly! WIN!

 WHAT TO DO:
In a good saute pan or medium sized heavy saucepan,
turn on low-medium heat.
Preheat your pan before you add any oil or anything to it.
Again, my hero The Frugal Gourmet always said,
"hot pan, cold oil, food won't stick" - 
and that has always stuck with me!

SAUCE WITH MEAT:
Once your pan is hot, drizzle in some olive oil,
cook your meat along with diced onions
and garlic until browned - season while cooking
with salt and pepper (over and above what is listing above)
 stirring often, drain.
Bring back to the stove/heat and
immediately add your tomato paste and combine.
Fill your empty cans with water 2-3 times each
and add to your cooking sauce.
This helps to rinse the cans out without wasting.
Continue to stir until it comes to a low boil.
Add your remaining ingredients and most importantly
TASTE it from time to time.  
Remember, it takes less salt if you add it while cooking
than waiting until it gets to the table.
In the meantime, while your sauce simmers away,
you can boil some water for your favorite pasta.
That's it - the only other decision you have to make
is whether you want to serve your sauce separately or 
toss it with your pasta. (We keep ours separate!)

SAUCE WITHOUT MEAT:

Once your pan is hot, drizzle in some olive oil,
dump your garlic into your saute pan and don't walk away.
Stir the garlic and when you start to smell it, it is done.
 Immediately add your tomato paste and combine.
Fill your empty cans with water 2-3 times each
and add to your cooking sauce.
This helps to rinse the cans out without wasting.
Continue to stir until it comes to a low boil.
Add your remaining ingredients and most importantly
TASTE it from time to time.  
Remember, it takes less salt if you add it while cooking
than waiting until it gets to the table.
In the meantime, while your sauce simmers away,
you can boil some water for your favorite pasta.
That's it - the only other decision you have to make
is whether you want to serve your sauce separately or 
toss it with your pasta.
(We keep ours separate!)

This sauce is so great - I love it because it is fresh tasting
and the flavors can be controlled right in my kitchen!
You can use this on pizza dough or for dipping.

I certainly hope you will try this sometime - 
toss the Ragu out the window and make your own!
You'll be glad you did!


Friday, March 16, 2012

Our Own Meltdown on 30A!


What a fantabulous week this has been
spending Spring Break
in the panhandle area of Florida in Seagrove.
We truly love this laid back area
located directly on Scenic Highway 30A,
 between Seaside and Rosemary Beach.
30A is a 19 mile road that hugs the coastline
in South Walton County.
This highway begins about 30 minutes
past the ever popular Destin.

On a weekday venture out to see some sites,
we stopped in Seaside
for some picture taking and lunch.
One of our fav eateries is
The Meltdown on 30A.
The Meltdown is one of several businesses there
that is housed in a dashing Airstream RV. 

Their specialty is, of all things,
gourmet grilled-cheese sandwiches.
And there is ALWAYS a line of people waiting!
This is their own Grilled Cheese with Bacon!
Mmmm
My fav sandwich there
is made with feta, arugula and tomatoes
on yummy, buttery,
thick sliced sourdough bread.
YUMMMM!
This is our version of it
(sadly, a much thinner bread).


So for this week’s Free Recipe Friday,
we are recreating that very sandwich for you
and challenging you to be adventurous
with YOUR grilled cheese sandwiches as well!
You can have your own meltdown,
right in your kitchen! ;)

Here's a few of their best sellers -
-- Brie | Bacon on Cranberry Walnut Bread --
-- Smoked Turkey | Avocado | Cheddar on Sourdough --
-- Pimiento Cheese --
-- Mama's Meatloaf --
-- Ham | Gouda | Dijon and Bechamel Sauce --
-- Italian Three Cheese
(Provolone, Fontina and Asiago)
with Pesto and Proscuitto on Whole Grain --

and the list goes on and on!
Be adventurous and create your own!

WHAT TO DO:
Butter your choice of bread
Add your choice of fillings
Cook in a heavy, nonstick pan on each side
on medium low heat, until the ooey,
gooey-ness oozes out!
VOILA!
Be adventurous and enjoy!


Friday, March 9, 2012

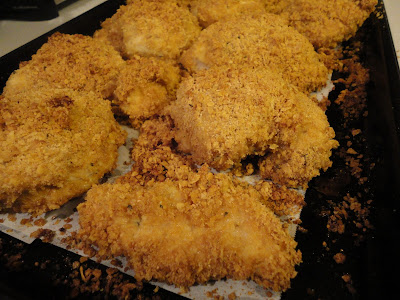
Get Ready to Slap Yo Mamma, it's Breaded Ranch Chicken!

 
On this pre-Spring Break Friday, you are in for a treat.
The famous, infamous, dreamed about Breaded Ranch Chicken recipe is HERE!
Some of you have had it, some of you have craved it...
now you can make it your very own!

I was first introduced to this recipe way back in 2003,
when my awesome cook of a sister-in-law Julie
began to train me to take her place doing the
Wednesday Night Suppers at our church....
and this was one of the favs back then.
I had never heard of this recipe until then, but it's kind of like Pringles...
you try it once, you'll be hooked!

It's super easy, super yummy and you quite possibly
might have the very ingredients staring you in the face
in your very own kitchen.

WHAT YOU NEED:
(this recipe is for 8 servings - tho it could easily be reduced)

Boneless chicken breasts, appx. 8
 (I used the whole Great Value bag)

Cornflakes, appx. 4 cups after crushing
(I used half of a large box of Great Value flakes)

Butter, melted, appx. 1 1/2 sticks

Parmesan Cheese, appx. 1/2 - 3/4 cup

Ranch Salad Dressing Mix, 1-2 pkgs
(we used the powder in a can, appx. 1/4 cup)

WHAT TO DO:
- Preheat oven to 350.
- Spray a baking sheet with non stick spray.

 - Crush cornflakes - I used a food processor,
but you can also dump them in a large freezer bag
and pound with anything from a rolling pin,
the flat side of a meat pounder to a heavy glass.


 - Combine cornflakes, ranch powder and parmesan. Set aside.
That's it.  That's the magical mixture!


 - In a separate bowl, melt your butter in the microwave.
Take a thawed chicken breast and dip in the melted butter,
immediately dip in the cornflake mixture, coating both sides well.
Place on prepared baking sheet. Continue with remaining breasts.


- Bake uncovered for appx. 30 minutes.

DELICIOUSNESS!!!!


Saturday, March 3, 2012

The best brownies EVER!


This has been one of those brownie kinds of weeks.
(Especially after the fact that I mistakenly posted this to the wrong blog.)
In fact, at a routine doctor visit the other day, 
where I mentioned possibly being a tad 'hormonal'
(and who isn't by the way?!)
. . .she, THE DOCTOR, told me to eat dark chocolate!
HA! I LOVE IT!
My doctor TOLD me to eat dark chocolate
whenever I felt sad, depressed, crabby or grouchy!
I mean, I had heard long ago that chocolate had
things in it to help those other 'things' in your brain...
but it was definitely a first to hear my doctor say EAT CHOCOLATE!
So that pretty much means I should have 
some chocolate on hand EVERYDAY!  Hooray!!!

So, if you've had a brownie kind of week,
THIS is the perfect recipe for you!
This recipe came from Amy's Bread in New York City.
A bakery that is reportedly the best in NYC.


I stumbled upon this recipe 4 or 5 years ago 
and I don't even know how I did that.
But, as one who has always searched for a great homemade brownie recipe
and has ALWAYS been disappointed at every attempt. . . .
I was almost hesitant in trying these. . .but, WOW, am I glad I didn't hesitate.
They are THE best brownies I have ever had!
As of a year and a half ago, these jewels sold for $3.50 a piece. 
They are easily worth $5.00 ;) ha.

INGREDIENTS:
3 1/3 cups semisweet chocolate chips (20 oz)
(almost 2 bags of chips)
3 oz.  unsweetened chocolate, chopped
1 cup unsalted butter (2 sticks)
1 cup granulated sugar
3 large eggs
1 tablespoon vanilla
 1/2 cup + 1 tablespoon flour
1 1/2 teaspoons baking powder
1/2 teaspoon baking soda
1/2 teaspoon kosher salt

1 3/4 cups chopped walnuts, toasted (optional)

WHAT TO DO:
Preheat oven to 350.
Butter and line a 9x13 baking dish with parchment paper.
I butter my dish (to keep the paper from moving)
then lay a piece of parchment paper on top and butter again. 
(you can buy parchment paper in a roll on the saran wrap aisle)

In a microwavable bowl or large measuring cup,
place your butter, unsweetened chocolate and HALF
of your chocolate chips. . .melt in your microwave.
Stirring after 30 second - 1 minute intervals -
remember, the chocolate will continue to melt
after it's removed from the microwave
so you don't need to cook it to death.
Set the melted chocolate mixture aside to cool down.

In a separate medium size bowl,
whisk together your eggs, sugar and vanilla -
Do not over stir - this will cause crumbly brownies, set aside.

In another separate medium size bowl,
dump your remaining dry ingredients.

Once your chocolate mixture has cooled down,
fold it into the sugar/egg mixture -
resist the urge to over-mix.

Now, whisk your dry ingredients into the
chocolate/sugar combined mixture.
Whisk until barely combined -
 stir in remaining chocolate chips, do not over-mix.

Pour mixture into prepared baking dish,
spread evenly and bake for 32-36 minutes.
The edges will be firm and the center will be soft.
Cool completely as there is alot of chocolate in these.
If you need to speed up the process, refrigerate them before slicing.
And remember, plastic knives cut brownies the best!

Yield: appx. 15 good size brownies


ENJOY!!!! (doctor's orders)

Followers