Friday, November 8, 2013

Shells and Cheese

Do you ever look back and remember meals your mom made??? Do you ever wonder how she fed the whole entire family with one small roast? I know portion sizes have gotten larger but, goodness - were our quantities THAT much smaller???

Even more strange, I remember certain meals being made and served in certain pots, bowls and platters.  We never ate buffet style from the stove as we often do in our house these days.  It didn't matter to my mom if it was a weeknight or Sunday lunch, dinner was always served at the table and NOT in the dishes it was prepared in. Oh, heavens no.  


Do you remember what it was like to come in from after school activities and you saw a certain pot or dish out? I do, and immediately knew what we were having for dinner!  Somehow I don’t think it’s that way anymore.  Do we have too many dishes these days or do we just cook a bigger variety?

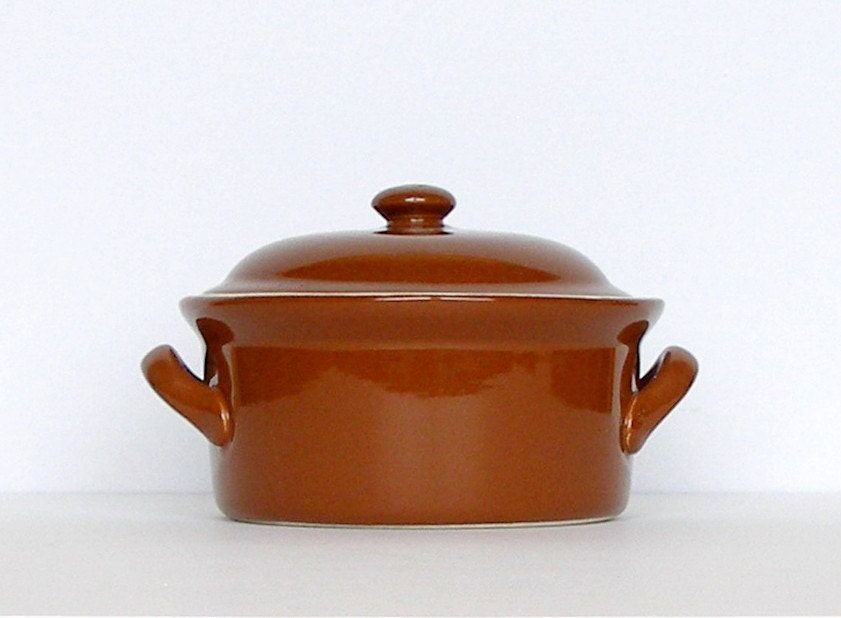
One of my favorite memories is homemade mac and cheese.  Made in a specific brown round ceramic dish with it's own matching lid.  My mom made that faithfully and Every. Single. Time. It was made in that same dish.  Mac 'n cheese in our house was always a side dish to meatloaf or salmon croquettes.  I was always so happy when it accompanied meatloaf, because I wasn't the biggest fan of that, so having a good side kept me from going hungry!  I bet that dish was probably only 8 or 9 inches in diameter. How in the world did she feed 5 people with that?!  It was homemade macaroni and cheese for goodness sake!

Okay, enough ranting - let's get to the yummy stuff - modern day crazy out of this world good, homemade Mac 'n Cheese.  You'll die. 

This is definitely not yo mama's homemade mac 'n cheese.  

Making homemade mac 'n cheese, no matter what 'flavors' you want,
is basically all the same.
Boil the noodles to al dente, drain
and place in a butter lined casserole dish.
Add in a few cups (globs) of cheese,
my mom used velveeta,
 we use assorted cheeses, some butter and some milk,
salt and pepper.  Mom would top hers
with some shredded cheddar and then bake.
We made an outright cheese sauce and poured it in,
stirred and then baked.
Mom's would make it's own sauce
during the baking process.
Our baking process was much shorter
and we topped ours with bacon. Win.
Are you thoroughly confused yet???


Our middle daughter, Shelby,
 introduced us to this fancy mac
that we've named, "Shells and Cheese."
We don't eat it too often but, she's been the maker of it
every time.  For us,
we add a side salad and it's a complete meal
it's that rich (and good).


WHAT YOU NEED:
recipe fills a 9x13 dish and feeds 12-15 - perfect for the holidays!
this can easily be halved for a 9x9 dish and feed 6 or so


1 lb box of penne pasta - cooked al dente
1 cup bacon - diced
1/2 cup onion - diced
5 tablespoons butter

6 tablespoons all purpose flour
1 tablespoon mustard - dijon

3 cups whole milk
1 cup cream (or sub with whole milk)
1 teaspoon dried thyme (use more if fresh)

1 bay leaf - crumbled
1/2 teaspoon salt
2 cups shredded monterey jack
1/2 cup shredded white cheddar - we used Cabot
(and a bit more for topping)

 1/2 cup blue cheese - crumbled
1/2 cup parmesan (and a bit more for topping)

WHAT TO DO:
After boiling pasta in salted water until al dente,
drain and place in a buttered 9x13 baking dish.
Set aside.
Cook diced bacon until crispy, remove and set aside.
Keeping bacon grease in the same pan, saute onions until clear.
Add in the butter and stir until combined.
Using a whisk sprinkle in flour and stir constantly
making a roux.  Whisk in the mustard.
Gradually add in milk/cream stirring well.

Add onions and bacon grease into reserved pasta.
(You can certainly omit extra grease if need be)
Next, add in spices and salt and simmer for about 15 minutes.

Strain out any bits of bay leaf and quickly stir in cheeses.
Stir until melted and add mixture into reserved pasta and stir well.
Top with a little extra shredded cheese and parmesan.
Bake in a preheated 450 oven for about 15 minutes
or until golden and bubbly.

Before serving, top with reserved bacon crumbles and chopped parsley.
This is a richer than normal version of mac 'n cheese.
For an old fashioned traditional version
substitute the cheeses with about 3 cups of cubed velveeta,
omit the onion, mustard, thyme and bay leaves
and top pasta with shredded cheddar
before baking.
The old fashioned version is pretty close 

to what my mom used to make
(in that little brown dish - quite similar to the one below)  
Vintage Hall Stoneware Casserole. Lidded Baking Dish. Rust. Brown. Cream 
If you've never tried homemade mac 'n cheese,
I hope you will soon
it will be your new favorite comfort food!

A big thanks to middle daughter Shel (Shelby)
for introducing us to this
and expanding our horizons.

ENJOY!


Friday, October 25, 2013

Fungus and Cow Flesh


This crisp night air reminds me of many different foods, but today I will focus on pot pies.  The lovely, the delicious, pot pie.  In my high school years pot pies were those little frozen things in the cute little pie tins.  Fresh out of the oven they'd be lava hot for about an hour before you could safely eat one.  Fall reminds me of these because of Friday nights. Friday's were a bit crazy.  Dad always coached, and us kids were always involved in various Friday night activities.  My mom was an amazing cook but in those days she turned Friday nights into frozen meal nights.  A frozen dinner, a pot pie, etc.  We loved it.  She was smart like that because we were all going in a million different directions and she got to have the 'night off.'  She made it easy on herself and as teenagers we LOVED processed food!  It was a win for everybody.

These days, you couldn't MAKE me eat a Tyson's frozen pot pie.  Marie Callender's, MAYBE.  But I'm here to tell you there is something much better out there and still pretty dog gone easy.  This week's Free Recipe Friday star of the show is Beef and Mushroom Pie.  You'll die it's so good.  It may indeed become your new modern day comfort food.  Our family is split down the middle on our love of mushrooms, so if you do not like mushrooms I feel your pain.  You can easily omit them if you'd like.  This recipe made six large servings using 6 oz ramekins, you could make one large pot pie if you'd like, but I don't like to share my crust.  Cut the puff pastry crust into whatever shape will cover your dish and you've got a winner of a meal! Deeelish.


WHAT YOU NEED:
a 3 or 3 1/2 lb chuck roast, cut into chunks
1 large onion, diced
3 carrots, diced
2 celery sticks, diced
about 1 1/2 cups of mushrooms, sliced (opt)
2 cloves garlic, minced
2 tsp paprika (smoked if possible)
1 tsp dried thyme
1 tsp dried rosemary (we used fresh)
1 tsp dried oregano (we omitted this)
2 bay leaves
2 cups good beef broth
1 tablespoon flour
3 tablespoons milk
salt/pepper to taste
1 sheet puff pastry, thawed and kept cold until ready to use
 (found on the frozen aisle)
1 egg

WHAT TO DO:
Spray a medium size heavy pot with non stick spray
and place on medium heat.  Brown the beef on all sides and set aside.
In the same pot, saute onions, carrots and celery
until soft, about 10 minutes.
Add the mushrooms and garlic and fry for about 5 minutes more
then add paprika and other herbs.
Pour in the beef broth and place the cooked beef back into the pot.
Stir to combine everything and reduce heat.
Cover the pot and simmer gently for 1-1 1/2 hours.
(For an easy dinner, do this step ahead of time
or simmer the meat in a crock pot or in the oven).

In a small bowl combine the flour and milk with a fork
until all lumps are gone, set aside.
When the meat is really tender and about to fall apart,
turn the heat back up and pour in the flour mixture.
Allow the sauce the simmer and thicken,
stirring often, about 10 minutes.

Preheat the oven to 350.
Divide the beef and mushroom mixture evenly
among your dishes and remove the bay leaves
when you find them ;)
Cut the puff pastry into big enough pieces to cover each dish.
For a perfect fit, you can place an empty dish on top of the puff pastry
as a pattern and cut with a sharp knife.
Place each puff pastry on top of the filled dishes.
Our large mouth dishes required 2 sheets of puff pastry.
Cut 2 slits in the top of the puff pastry to allow
that good ol' steam to escape.
(We covered the scraps with cinnamon and sugar
and baked them right up for little snackies!)

Quickly brush the top of each puff pastry
with the beaten egg to give them
a golden shine and lay all dishes on a baking sheet
to protect your oven,
they will most certainly spill over a bit.
Bake for 25-30 minutes.
Remove from the oven and let them rest a bit
 before serving - your taste buds will thank you.

Serve these with a side salad or your favorite veggies,
they are such a comfort food.
It's like the comforts of roast and gravy
along with pot pie rolled into one.


Enjoy making this pot pie your new family favorite!


Friday, October 11, 2013

Eat Your Broccoli!

Don't know what you're hungry for?  Want something easy but, still looks swanky?  How about crepes???  Sweet or savory, crepes can be your best friend.  They are easy to whip up ahead of time and fill with anything from chicken (fresh, grilled, leftover, or a rotisserie) and veggies, to nutella and strawberries, or strawberries and cream.  How's that for some Friday fun?!  The batter can be easily whisked together or thrown in a food processor, and you'll be spitting out crepes left and right.  Stack them in between wax paper and store them in a large ziploc bag and you will be ready for a quick supper or dessert any day of the week.

These tried and true chicken and broccoli crepes are treasures from The Tuttle House, a little tea room my parents owned years ago.  Crepes were a daily special and you could go the savory chicken route or finish off your meal with a couple of strawberry crepes for dessert.  Either way, you can't go wrong.  

Back in those tea room days, we actually made a crepe batter using Bisquick.  Easy peazy but, now we use a more authentic recipe.  Thinner crepe equals more traditional.  Our pastor traveled to Paris a few years ago and he came back raving about how large the crepes were.  Spread with nutella and filled with strawberries.  So large they would fold them in half and then in half again to eat them.  Doesn't that sound scrumptious???  Give it a go one day when you feel like making see through pancakes, which is what they remind me of, and you can day dream that you are in Paris!!!

WHAT YOU NEED:
2 large eggs
3/4 cup milk
1/2 cup water
1 cup flour
3 tablespoons melted butter
butter, for coating the the pan

WHAT TO DO:
In a food processor (or with a whisk),
combine all ingredients and pulse for 10 seconds.
Place crepe batter in the fridge for 1 hour.
This will allow the bubbles to subside so the crepes
will be less likely to tear during cooking.
The batter will keep for up to 48 hours.

Heat a small non-stick pan on medium low heat.
  Add butter (or non-stick spray) to coat.
Pour 1 ounce of batter (appx an 1/8 of a cup) into the center of the  pan
and swirl to spread evenly.
Cook for 30 seconds and flip. 
Cook for another 10 seconds and remove to a cooling rack.
Sometimes that first crepe is just not pretty,
don't feel bad - just toss it and keep on goin'!
Now, lay them flat to cool and continue until all batter is gone.
Layer them in between wax paper and store in a large ziploc bag.
Fill them with your favorite things!
WHAT YOU NEED FOR - CHICKEN CREPES
1/4 cup butter
1/4 cup flour
2 teaspoons Worchestershire
2 cups chicken broth
3 cups shredded cheddar
1 16oz container sour cream
appx. 3 cups shredded chicken
1 pkg frozen chopped broccoli, thawed
salt/pepper to taste

WHAT TO DO:
In a saucepan on medium heat,
melt the butter until it just starts to sizzle.
Whisk in the flour and cook for a minute or two.
Add in Worchestershire and chicken broth.
Stir to combine.
When mixture starts to thicken (stir often)
add in shredded cheddar and stir until melted.
Remove from heat and add sour cream.
Keep on super low heat, as you do not want to curdle the sour cream.

In the meantime, have your chicken handy and warm.
Cook the broccoli either in the microwave or on the stove top
to warm up and to remove excess water, season.

When everything is ready to go, fill and roll up each crepe
with a few spoonfuls of broccoli and chicken.
Drizzle some yummy cheesy sauce down the middle
and roll up.  To serve, spoon a little sauce on top.
(for a family of 5, we most certainly double the sauce recipe)
Serve with a side salad and you've just knocked one out of the park.
These are so light and yummy, it's like a french enchilada!

ENJOY!!!


Friday, October 4, 2013

Grab a Torch!

Fall is so close we can almost taste it.  We long for it around here but, it just seems to tease us over and over until Halloween or even later.  Now that we are actually in the month of October, we do like to pretend it's fall and decorate as such.  We imagine the leaves are falling off the trees due to the season, instead of stress from the heat and lack of rain. Even though it was still a whopping 85+ degrees yesterday, we made our first pot of chili but, we did crank the a/c down a bit and pretended it was cool outside.  The chili was great just the same :)

This week's Free Recipe Friday is a little something to get you going, to inspire you, to make your mouth water for those yummy fall recipes - and after all, it's glorified Creme Brulee for cryin' out loud.  I mean, come on!!!
Grab a torch and read along, you'll actually need it. 
Creme Brulee is NOT as froofy as you thought it was -
and we even brought a little redneck into it, so can you. 
You could make it tonight! :)

 
WHAT YOU NEED:
   6 - 6 oz ramekins
1 1/2 cups heavy cream
1 1/2 tsp. ground cinnamon
1/4 tsp. ground allspice
1/2 tsp. ground ginger
3/4 tsp. ground nutmeg
5 egg yolks
1/2 tsp. good quality vanilla
Pinch of salt
6 Tbs. pumpkin puree (fresh or canned)
1/3 cup granulated sugar (more for the topping)
1 Tbs. firmly packed light brown sugar

YIELD: 6 servings
WHAT TO DO:
Preheat oven to 300.  Fill a kettle with water and heat to boiling.
In the meantime, pour cream into a small saucepan and whisk in the cinnamon,
allspice, ginger and nutmeg. Set over medium-low heat and warm the mixture
until bubbles form around the edges of the pan and steam begins to rise
from the surface, about 3 minutes. Watch carefully. 
Remove from the heat and let sit to cool.

In a large bowl, whisk together the egg yolks, vanilla, salt,
pumpkin puree, and both sugars until smooth and blended.
Slowly pour in the cream mixture, stirring until blended.
Divide the mixture among the ramekins and place in a large baking pan(s). 
Add boiling water to fill the pan halfway up the sides of the ramekins.
Cover the pan loosely with aluminum foil and bake
until the custards are just set around the edges, about 30 minutes. 
Transfer the ramekins to a wire rack and let them cool to room temperature. 

Cover with plastic wrap and refrigerate for at least 4 hours or up to 3 days. 
Just before serving, remove the little jewels from the refrigerator
and discard the saran wrap.   
Set each on a sturdy, fire resistant surface and sprinkle 1-2 tbsp.
granulated sugar evenly over the surface of each custard.
Shake from side to side to spread sugar out evenly. 
Using a kitchen torch according to the manufacturer's instructions,
move the flame continuously in small circles over the surface
until the sugar melts and lightly browns evenly,
OR, place dishes on a baking sheet and place on
the closest rack to your broiler and watch carefully
until they have reached an even golden color.  Be patient. 
Just when you think nothing is happening,
the sugar will begin to melt and things start happening very fast. 
Remember, it is melted sugar - the equivalent to molten lava. 
Handle with care. The melted sugar on top will remain wet looking,
however it quickly cools and hardens ever so wonderfully. 
Serve immediately!
To see the full article click HERE
for the online issue of
The Wedded Bliss.

ENJOY!

Friday, September 27, 2013

Easy Peazy Japanezy

Are you obsessed with those little fried, origami looking, cream cheese filled, chunks of heaven called Crab Rangoon??? Three for a dollar at Panda Express.  Yes, I will take twelve please.  Of course, they are on every Chinese buffet table I've ever been to.  We've made them several times at home and let me just say, you really have to love the ones you are cooking for, because they take some time.  As fast as our family eats them, well, let's just say it's gotta be love.  

We have, thanks to the wonderful and magical Pinterest, found this week's Free Recipe Friday - Crab Rangoon DIP.  It is really a no brainer.  You take the filling of a crab rangoon, put it in a baking dish and bake.  But seriously, why oh why haven't we thought of this sooner!!!??!?  You then slice the lovely wonton/egg roll wrappers and fry them up into whatever size you like.  Voila.  It takes a bit of time to fry those things up because you really only need to fry six or eight at a time.  They are very thin but, the good news is they cook very, very quickly and it's easy peazy.  The filling gets baked and after it's removed from the oven, needs to rest for several minutes to come out of that lava hot stage.  In the mean time, fry up the wonton chips while the mixture bakes or even the day before.  My family seriously thinks these wonton chips should be sold on every chip aisle - big bags, snack size bags - you get the idea.  They are so light and crispy and the flavor is so great with all kinds of dips (even hot sauce) but, until manufacturers get on this, we will have to keep fryin' up our own!

WHAT YOU NEED:
8 oz pkg cream cheese, softened
1/2 cup sour cream (optional)
1 6 oz. can crab meat, drained
5 green onions, diced (optional)
1 tsp honey (optional)
1 tsp soy sauce (we used a bit more)
1 tsp worchestershire (we used a bit more)
1/2 tsp garlic powder
1/2 tsp sugar
1/2 tsp salt
1/4 tsp black pepper

You can tell by all of the 'optional' items above
this is a foolproof recipe, really.
Just keep tasting and tweaking it to your liking.

WHAT TO DO:
Preheat oven to 400.
Combine all ingredients in a medium size bowl
and mix until well blended and smooth.
Spray a 9x9 baking dish or a pie plate
with non stick spray.  Pour mixture in baking dish and bake for 15 minutes.

Remove from the oven when the edges are a bit golden
and the center is bubbly.
Cool a bit before diving in for the welfare of your mouth.

Fry up your sliced wontons in a large pot with 2-3 inches of veggie oil.
Gently drop a few wonton wrappers in and watch closely
toss and turn a bit and they will be done.
Drain on a wire rack and/or paper towels.
To serve, pour them up in a large basket and get ready for love.
If you won't eat them immediately,
let them completely cool and store in large freezer size baggies.
Ours got a little toastier than I would have liked,
but they tasted just fine! Mmm.
 This is how our family attacks this stuff.  Sooo good.
Serve it up with some homemade Chinese food
or make it just for snacking - either way
you'll have them begging for more!

Fortune cookie anyone???

ENJOY!!!!

Followers